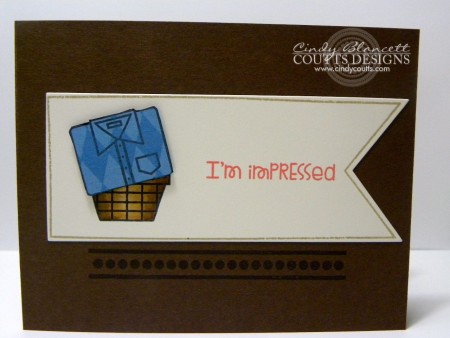
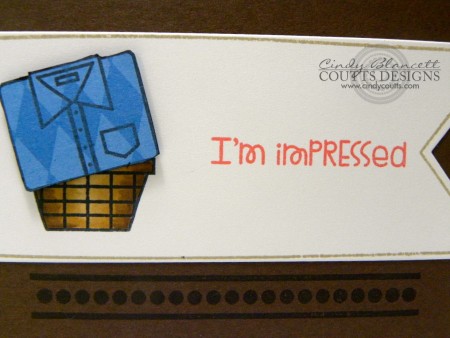
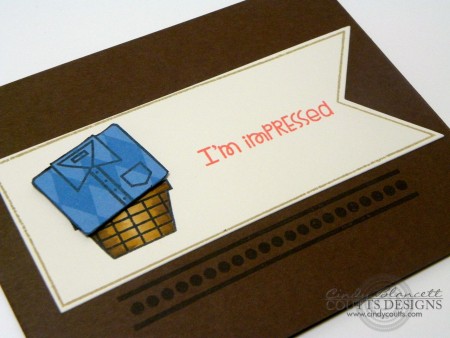
Hi friends. I wanted to share a quick Saturday morning card with you. This is a great masculine card that was very easy and fun to make. I especially love the color that I stamped my sentiment in for the splash of color that it lends to the card. This is a fabulous sketch!
As I wrote the Tips & Tricks below, there's about 10 other ways that I can make this card and if I had the time, I would do it. Lots of possibilities here. While I was cleaning up as I work, which is a first, I decided to add a fun argyle pattern to the shirt. Even though it may seem that a lot of work went into this card, it's still very clean and simple with little details that make a world of difference.
Remember that when you fussy cut out an image, be sure to run around the edges a non-alcohol-based marker to cover up any inconsistencies and to darken the edges. Alcohol-based markers will bleed depending on the type of card stock that you use. I always use a Stampin' Up! Basic Black marker to play it safe. I also made sure that I lined up my images on the banner first before I stamped the basket so that they would stay within the space of the banner. Do all stamping before adding dimension to any panel so that it doesn't end up all wonky on you. If your image on foam dots isn't too high, a stamp press can sometimes help out.
I chose lighter brown shades to color my basket in with to compliment the color of the base of my card. I forgot how much fun it was to color browns since I haven't done that for a long time.
Thank you so much for stopping by to visit me today and God bless you!


Add patterned paper for a more masculine card with a sophisticated look and buttons at the bottom of the banner to tie the image in. Lightly ink distress the banner or paper piece the shirt. I stamped a fun argyle pattern. Dry embossing the shirt with an argyle embossing folder or impression plate would be great and then coloring the shirt.

Add patterned paper to send to a girlfriend for encouragement. To really brighten up the card, use Melon Mambo as your card base.

Use a background stamp or images stamped in Versamark to fill out the card more. Since my card is clean and simple, I eliminated this step, although I really wanted to add one! If the background pattern you choose is subtle enough, it can be pulled off but I had my eye on the perfect busy pattern.

Stamps: Flag Tags, Potpourri, Squeaky Clean, Tri-balation (Paper Smooches)
Card Stock: Blueberry Sky, Dark Chocolate, Vintage Cream (Papertrey Ink)
Ink: Tuxedo Black (Memento), Berry Sorbet, Blueberry Sky, Classic Kraft, Dark Chocolate (Papertrey Ink)
Markers/Colored Pencils: E53, E55, E57 (Copic markers)
Die-Cuts: Flag Tags (Paper Smooches)
Tools: Stamp Press (Martha Stewart), Big Shot, Stamp-a-ma-jig (Stampin' Up!)
Technique: Die-cutting, fussy cutting
Size: 5-1/2 x 4-1/4, crease at the left

Cut brown card stock to 4-1/4 x 11, score at the 5-1/2 mark, fold and burnish so that the crease is at the left side.
Die-cut a banner with cream card stock and stamp the coordinating image to frame the banner using Kraft ink.
Stamp on basket image with black ink and color in with markers. Stamp shirt image onto blue card stock with black ink and then stamp argyle pattern onto the shirt image and fussy cut. Adhere shirt image above the basket image with foam dots. Stamp sentiment to the right of the basket and shirt images with berry-colored ink.

Adhere image panel to the brown card stock base.

Ink dotted image with brown ink and stamp below the image panel.
 Pin It





 Add patterned paper for a more masculine card with a sophisticated look and buttons at the bottom of the banner to tie the image in. Lightly ink distress the banner or paper piece the shirt. I stamped a fun argyle pattern. Dry embossing the shirt with an argyle embossing folder or impression plate would be great and then coloring the shirt.
 Add patterned paper to send to a girlfriend for encouragement. To really brighten up the card, use Melon Mambo as your card base.
 Use a background stamp or images stamped in Versamark to fill out the card more. Since my card is clean and simple, I eliminated this step, although I really wanted to add one! If the background pattern you choose is subtle enough, it can be pulled off but I had my eye on the perfect busy pattern.
 Adhere image panel to the brown card stock base.
 Ink dotted image with brown ink and stamp below the image panel.

